Before you start using your Nintendo Switch in the family it’s important that you set it up correctly. This not only ensures that you are ready to start playing when the box is opened but also that you have the correct user accounts and limits. This page provides an overview of this process, for more detailed instructions visit the Nintendo website.
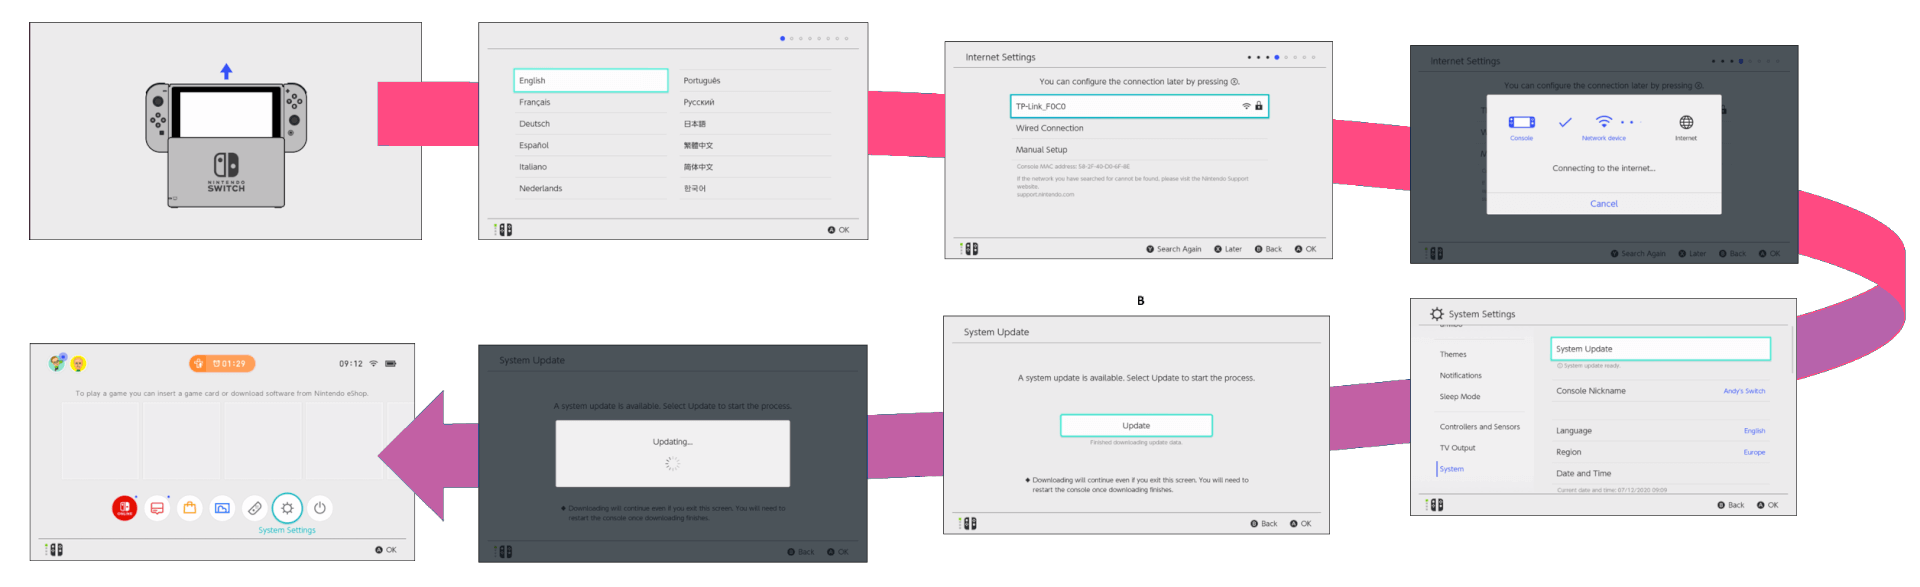
When you plug in your Nintendo Switch console you will be prompted to set it up. This is the initial connection to the internet and download of the latest software. The process of updating can take half an hour or so, although at peak times like Christmas day this will take much longer as more people are accessing the console servers for updates.
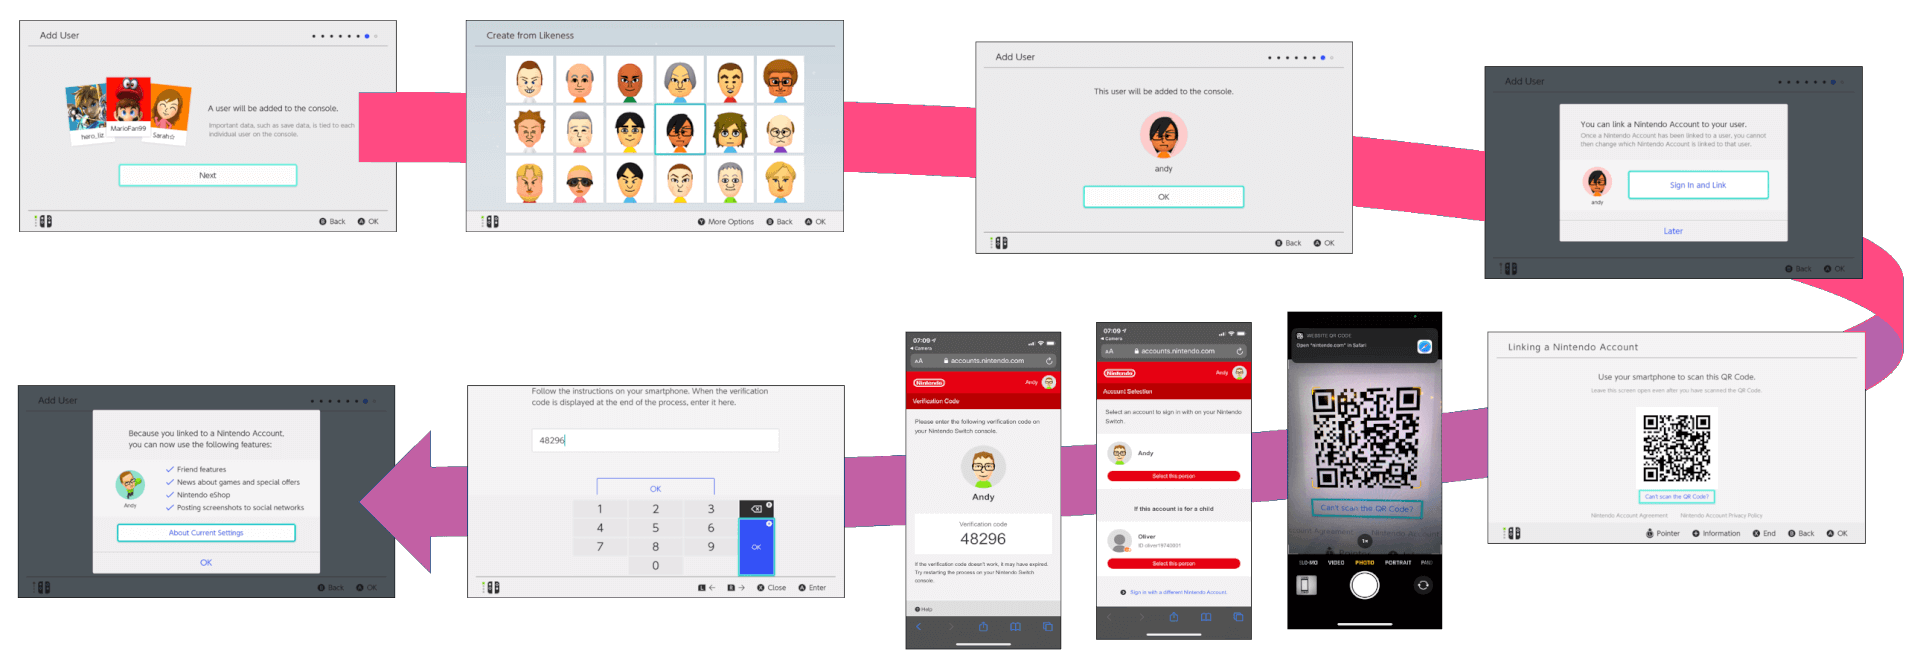
2. Setup a parent account
The next thing to do is to create a Parent account and connect that to your Nintendo Online account. This will allow you to go online, make purchases and interact with other users.
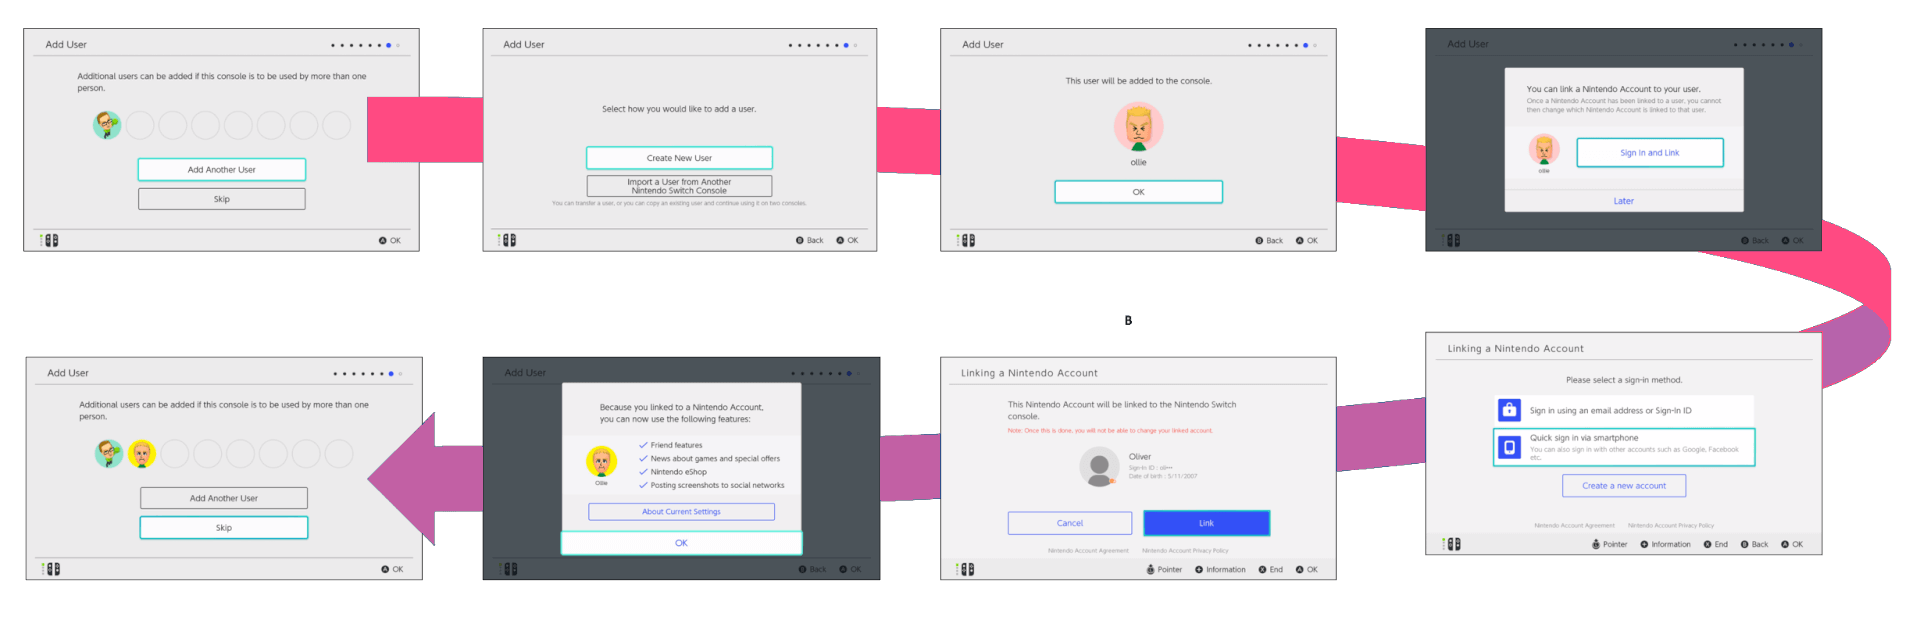
3. Setup child accounts and limits
You can now add child accounts. If you don’t already have a Nintendo account for them, you can create this via your browser.
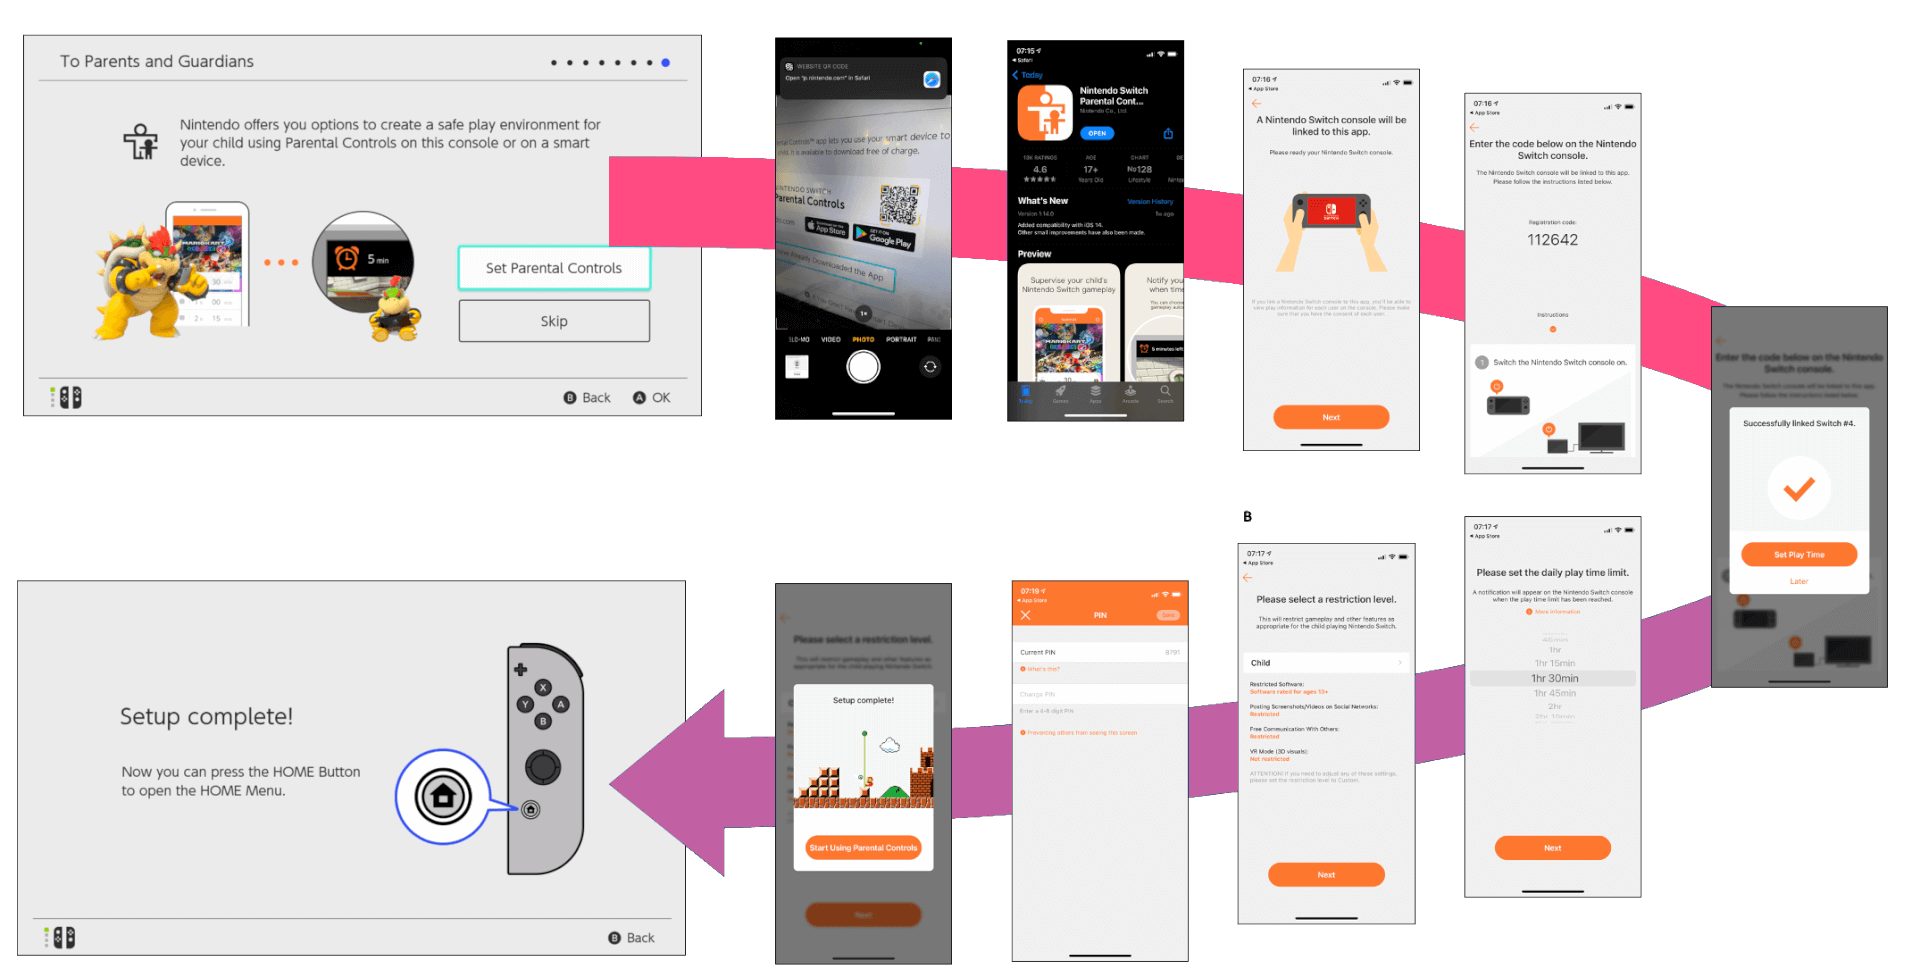
You can then specify the limits and restrictions for your Nintendo Switch system. Unlike Xbox and PlayStation, these apply to the whole system rather than a specific user. Download the Nintendo Parental Control app to set this up on the go.
As you can see below, this process takes you through setting:
Online interactions
Parental PIN code.
Screen Time limit.
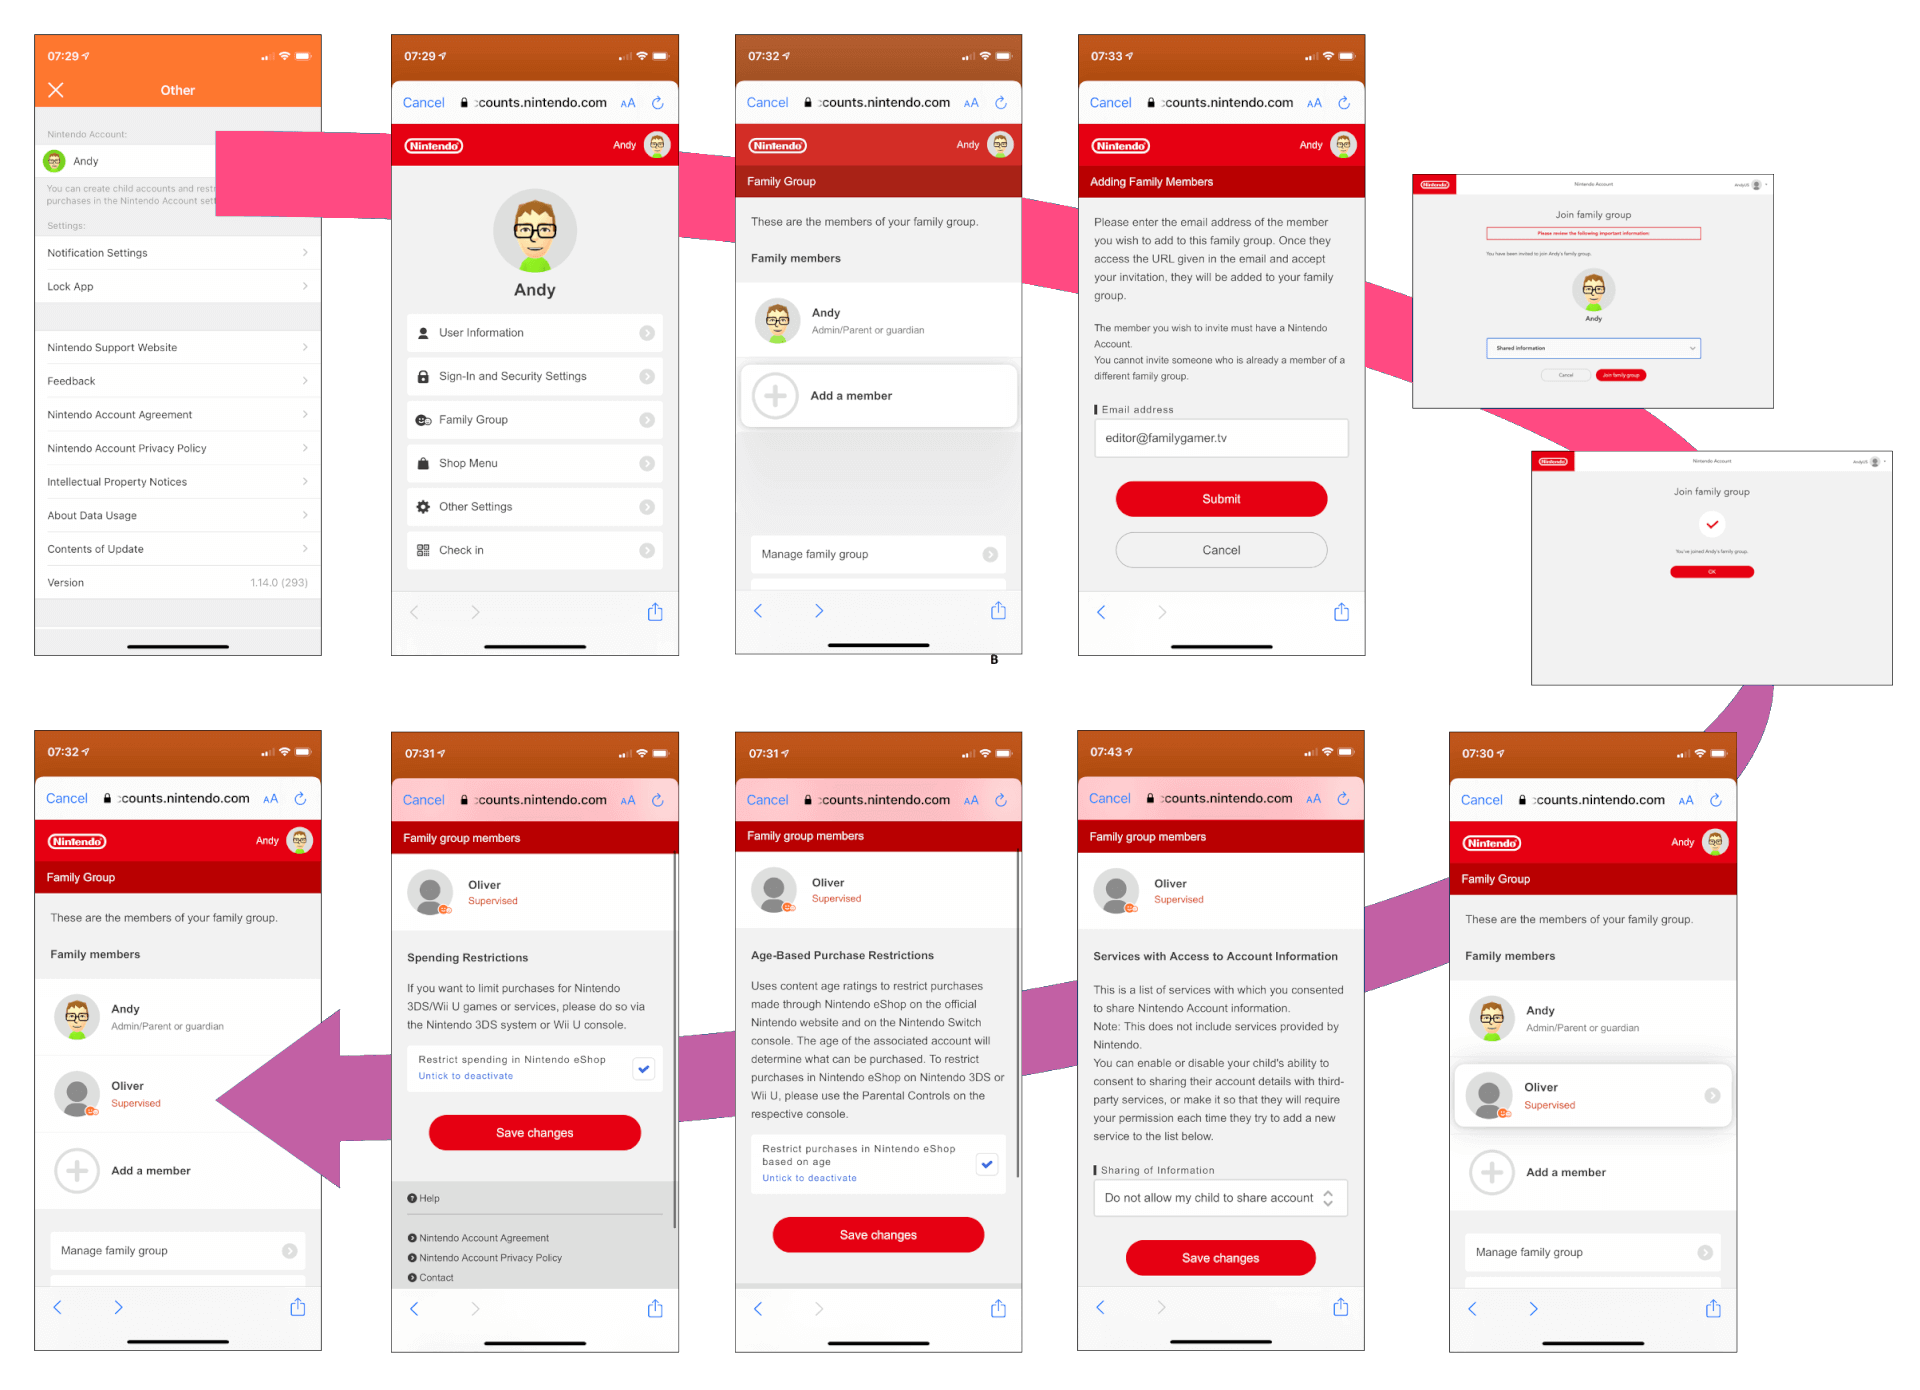
4. Setup family group
Once you have created the users on your Switch, you need to group them together as a family. This will not only enable you to share Nintendo Online Family subscription, but lets you control their data privacy, and apply restrictions in terms of their age and apply other spending restrictions.
Open the Nintendo Parental Controls app.
Tap settings and then your User.
Select the Family Group.
Add family members to the group via the Add A Member button.
Once you have the child added to the family, tap their icon.
Specify their settings in the menu.
Tap Save.
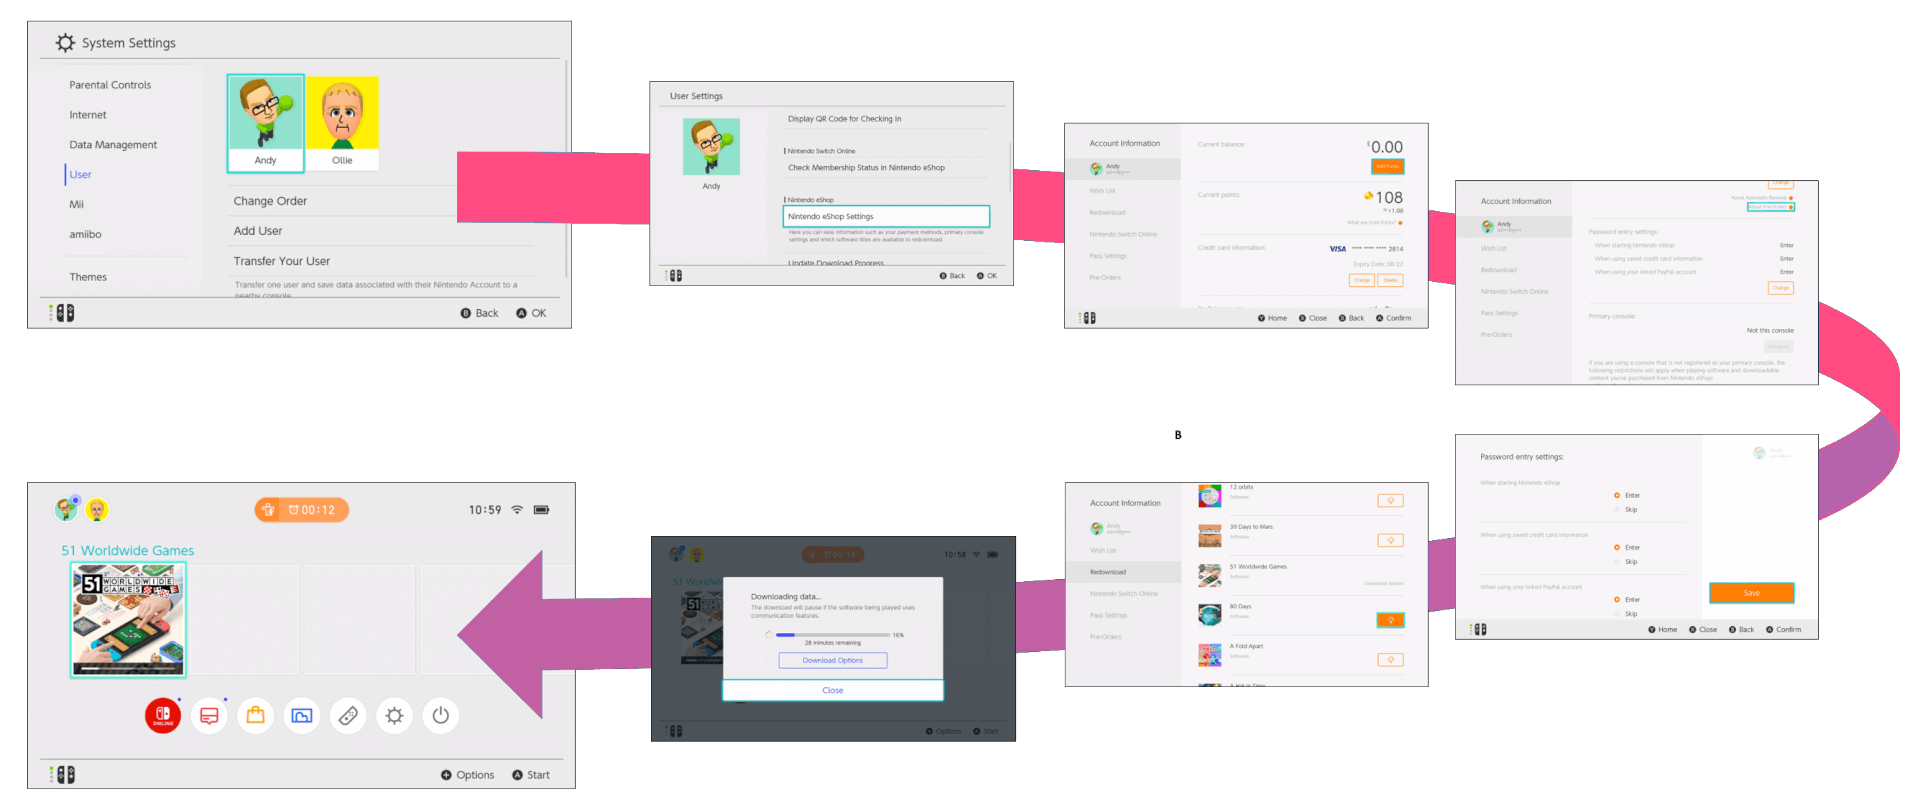
5. Spending limits and downloads
The final thing to do is to specify the passwords needed to make purchases on new games. This enables you to know what children are spending and when they download new games.
Once this is specified you can also download any games you want to play on your system. Although you can do this as you go along, if the console is a gift to be opened at Christmas, it’s worth doing this ahead of time as download times are longer at these peak periods.
This includes downloading games from subscription services like Nintendo Online. Putting in download codes for digital games you purchased. Inserting physical discs for games you have that may require an installation or update before you can play them.